This is most likely my craziest MIB yet, and not sure how many people could would want to replicate it. After taking the unlikeliest materials and combining them, I'm sure we have a winner. Hope your sewing machine can handle this cause I almost left mine in pieces after this little project. Cross something that is meant to go under your feet with a garment used for safety patrol and you have.....actually I don't really know what you have. We got texture. We got neon. We got something that will keep you fairly warm in the winter. What else could you want? Here is some inspiration and justification for my rash actions. I mean if Christian Siriano can do it, why can't i?
 |
| Christian Siriano Spring 2012 RTW Images via style.com |
You will need:
 |
|
 |
|
- Material to add to the vest, make it thick enough to add some weight
- Black vinyl or any heavy material for the cutouts (about 1/2 yard or so)
- Black dye
- Bucket for dyeing
- Sleeve pattern
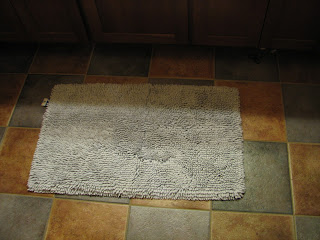
I began by dying this thrifted rug black, guess I wasn't really feeling that washed out, baby blue color.
When dyeing any fabric, use warm/hot water and add a little salt and laundry detergent. Let it soak for a good couple of hours and then try your patience by waiting for it to dry (it takes FOREVER for a rug to dry...)
Once you have achieved your desired color, get any pattern of a sleeve that fits you and pin it onto the rug. I originally wanted to make the whole jacket out of the rug until I realized I only had enough for well...two sleeves.
Cut out the pattern and sew together the pieces (yours may look different based on what kind of sleeve pattern you use, you can find a single piece or use one with an upper and underarm). This is one of the hardest parts other than actually sewing it so I have some tips, since the material is RIDICULOUSLY thick, trim some of the textured pieces near the seam allowances. This will make it easier to sew with less bulk.
After completing the sleeves I moved on to the actual vest, first lining to add stiffness to support them heavy sleeves. For the lining I used some beautiful, tablecloth-like, yellow material.
I cut the vest into pieces so the lining would be easier to directly sew onto each piece instead of trying to guess the size of each piece only by looking at it already sewn together....if that makes any sense at all. AKA, cut the pieces of the vest up, it's easier.
Pin it. Sew it together. You know the drill.
I then added some black panels on the sides to stray away from the rugged, construction look and go for a more intentional color block kind of thing. Hopefully, it was successful...
And saved you the hardest step for last, sew dem sleeves on the vest! You will begin by sewing together all the pieces you just cut up and lined (yeah redundant, I know) and sew up the sides to make it actually fit. Then match the circumference of the sleeve to that of the armhole and sew it, right sides together as usual.
I still haven't decided if this is as ugly as ****, or an accomplishment. But the moral of the story is that we took a rag, some insanity, and turned it to something new, even if its rather unattractive. But at least I'll stop traffic.


Gorilla Vest! Girl, props on creativity
ReplyDelete